QNetworkAccessManager Proxy Classes
This blog post will demonstrate how you can tap into QNetworkAccessManager (QNAM), the class is used by QtWebkit for all its networking. QNAM is also the recommended API for high-level networking protocols such as HTTP in Qt. The class is very simple, but provides some powerful features like disk caching, cookie handling, and support for Socks and HTTP proxies. There are many cases when it is useful to be able to watch the requests being made through QNAM, and this can be acheived using a proxy QNAM class.
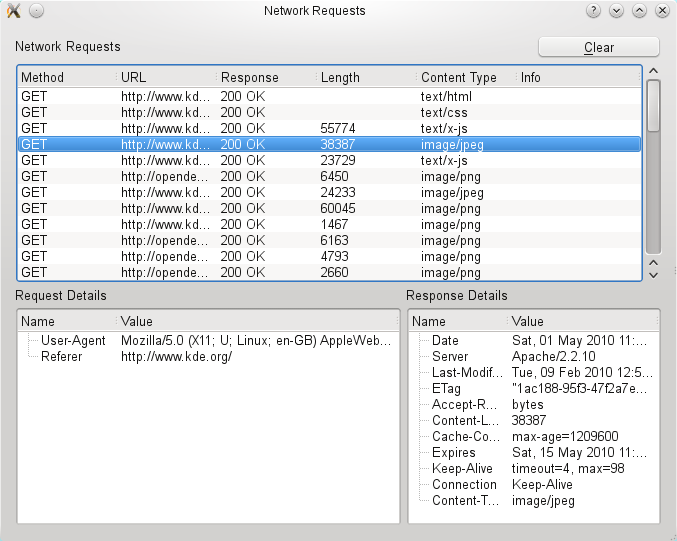
To illustrate the technique I'll use a simple proxy class to capture the requests as they are made, and display the information from the request and the response. The code was originally written foor the Arora web browser, but I've separated it out into a reusable stand-alone example. The result will be a display like this:

I won't describe the implementation of the viewer itself, but instead will focus on the proxy class, which is incredibly simple. The core method that QNAM uses is createRequest(). This method is used to implement various convenience functions like get() and post() and is where we need to take control. Our reimplementation is shown below in full:
QNetworkReply *NetworkAccessManagerProxy::createRequest( Operation op,
                                                         const QNetworkRequest &req,
                                                         QIODevice * outgoingData )
{
    QNetworkReply *reply = QNetworkAccessManager::createRequest( op, req, outgoingData );
    viewer->addRequest( op, req, outgoingData, reply );
    return reply;
}
All we're doing is calling the baseclass implementation and passing the information about the request to our viewer. It's really that simple. If we wanted to though, we could return a custom QNetworkReply which would let us directly control what happens to the request. This technique can be used to do things like restrict access of a browser to certain white-listed addresses, or to modify the content returned.
Making QtWebkit use our proxy class is simply a matter of calling setNetworkAccessManager, which we do in our main() function. The entire main function is shown below:
int main( int argc, char **argv )
{
    QApplication app( argc, argv );
    QWebView view;

    NetworkAccessManagerProxy proxy;
    NetworkAccessViewer viewer;
    proxy.setNetworkAccessViewer( &viewer );

    view.page()->setNetworkAccessManager( &proxy );

    view.setUrl( QUrl("http://www.kde.org/") );
    view.show();

    return app.exec();
}
Hopefully this is enough information to show just how easy using this powerful technique can be. In future I hope to provide a few further examples that show more complex proxy classes. As usual I've put all the code in my qt-example git repository on gitorious at http://gitorious.org/qt-examples/, enjoy.